Technical
Pool Tiles Over Fiberglass: What Most Installers Miss
Mar
Pool Tiles on Fiberglass: A Comprehensive Guide to Installation
This article provides a comprehensive guide on how to install pool tiles over a fiberglass pool. Although some may hold the misconception that this process is complicated, it is important to note that it shares many similarities with installing regular tiles. In addition to this, with the right approach, proper tools, and careful planning, the process can be completed efficiently.
Furthermore, favorable weather conditions and assistance from experienced professionals can significantly expedite the grout fixing process, ultimately resulting in quicker and more effective work completion. Therefore, by following this guide, you can discover essential tips on pool designs, tile options, and the step-by-step procedure needed for a successful tiling project.
Moreover, understanding the nuances of tile installation for fiberglass pools is critical. For instance, knowing how to prepare the surface properly, choose appropriate adhesives, and apply grout correctly can make a significant difference in the outcome. Consequently, investing time in thorough preparation and leveraging expert advice can save you both time and effort in the long run.
Exploring Installation Methods for Pool Tiles on Fiberglass
When it comes to installing pool tiles over a fiberglass pool, there are several tiling options available, each offering distinct benefits to suit different needs and preferences. These options include waterline tiling, over-the-lip tiling, and custom tiling throughout the entire pool surface. Each of these methods has its unique advantages, such as providing easy maintenance, enhancing the visual appeal of the pool, and increasing overall comfort for swimmers.
If you’re uncertain about which tiling option would be the best fit for your fiberglass pool, it’s important to consider the specific requirements of your project. Additionally, evaluating your aesthetic preferences and maintenance priorities can help you make a more informed decision. Keep reading for detailed tips and insights into each tiling method to determine the most suitable option for your pool.

1. Waterline Tiling
- Highlighting the beauty of the pool with visually appealing designs.
- Easy maintenance of the waterline through simple cleaning of the silicone and tile grout.
- Multiple color choices available to choose from to match your pool decor and personal style.
2. Over the Lip Tiling
- No need to wax the open fiberglass lip, saving time and effort in maintenance.
- The tiles will not tear or snag bath costumes, unlike cantilever cement and bricks, ensuring a comfortable and safe swimming experience.
- Easy cleaning of the tile and grout, simply requiring a wet rag or sponge, to prevent staining, cracking, or dislodging of the grout.
3. Custom Tiling throughout the Pool
Custom tiling involves covering the entire fiberglass surface with tiles, creating a long-lasting and durable finish. Furthermore, this method not only enhances the pool’s visual appeal but also provides a more robust and luxurious design. To help you get started, below is a comprehensive list of materials and tools required to complete the task effectively.
Materials Needed
- Cleaning Supplies: A piece of cloth and acetone for thorough surface cleaning.
- Silicone Tile Adhesive: Used to securely attach the tiles to the fiberglass surface.
- Litoelastic® EVO: An excellent choice for bonding mosaic tiles to fiberglass pools, ensuring superior adhesion and exceptional durability. This two-component epoxy adhesive is highly resistant to moisture, temperature variations, and pool chemicals. Additionally, its flexible and solvent-free application allows for secure tile placement, minimizing the risk of detachment over time. Ideal for submerged areas and high-demand environments, Litoelastic® EVO is the ultimate solution for a flawless and long-lasting finish.
- Pool Tile Sheets: Typically measuring 6 by 12 inches, these provide consistent coverage for a seamless look.
- Silicone Rubber Grout: For sealing the spaces between tiles and ensuring durability.
Tools Required
- Dish Soap and Sponges: Essential for cleaning the surface and tiles before installation.
- Wet Saw: Necessary for trimming tiles to the appropriate size and ensuring uniformity.
- Epoxy Rubber Grout Float: Used to spread grout evenly between the tiles for a smooth finish.
- Nylon Scrubbing Pad: Important for cleaning excess grout from the tiles after application.
- Bucket: For mixing grout to the desired consistency.
- Helper: To assist with the grouting process and tile placement, ensuring efficiency.
As you prepare, this detailed list ensures that you have everything necessary to complete the custom tiling process smoothly. Moreover, with the proper materials and tools, you can achieve a professional-quality finish for your fiberglass pool that is both durable and visually stunning.


How to Install Pool Tiles Over a Fiberglass Pool: A Step-by-Step Guide
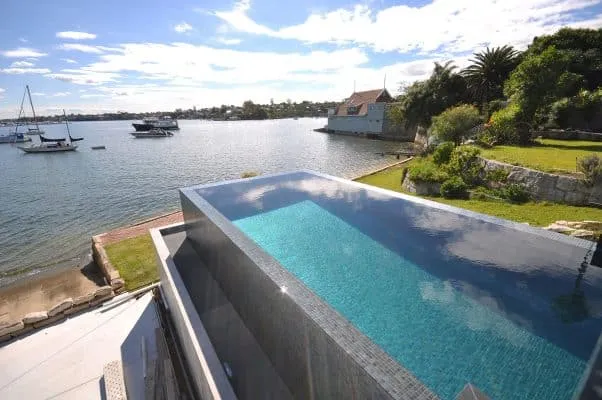
By incorporating glass tiles into your pool design, you can completely transform it into a sparkling and visually appealing oasis. Moreover, the addition of glass tiles enhances the overall aesthetic, creating an inviting space that stands out. Not only is swimming in a beautifully designed pool therapeutic and relaxing, but it also contributes to the overall value of your property.
As emphasized earlier, simply repairing existing pool tiles may not be sufficient to achieve the level of elegance and luxury you desire. Instead, incorporating high-quality glass tiles ensures a truly attractive and sophisticated pool design that will leave a lasting impression.

Step-by-Step Guide to Installing Pool Tiles on Fiberglass
Step 1: Prepare the Fiberglass Pool
To start, completely drain the pool and ensure that all surfaces are thoroughly dried. Next, sand the edges and bottom of the fiberglass pool to create a rough texture, which improves adhesion. Remove any debris or dust from the surface. Finally, clean the entire surface with acetone to eliminate dirt, grease, and oils, ensuring a clean base for the tiles.
Step 2: Measure and Prepare the Tiles
Measure the pool area accurately to determine the number of tiles needed for the project. This ensures you purchase the correct amount of materials. Trim any irregular tiles using a wet saw to achieve uniform sizing. Preparing the tiles properly will help create a seamless and visually appealing finish.
Step 3: Apply Silicone Adhesive
Using a spatula, spread a thin, even layer of silicone adhesive on the back of each tile. Be sure to cover the entire surface of each tile to guarantee a secure attachment. Take your time during this step to ensure an even application, as this is crucial for the tiles to adhere properly to the fiberglass surface.
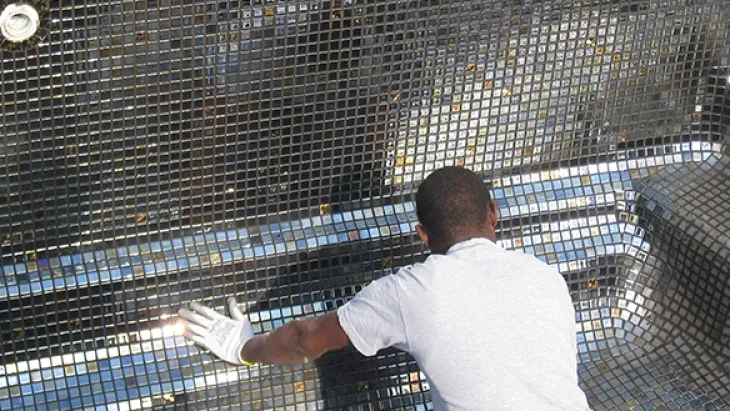
Step 4: Lay Pool Tiles on Fiberglass
Start by placing the first set of tiles along the pool wall, ensuring proper alignment. Press the tiles firmly onto the fiberglass surface to secure them. Continue by laying subsequent rows, aligning them evenly with the previous ones to avoid gaps or uneven edges. This step requires precision to ensure the final result is uniform and professional-looking.
Step 5: Grout the Tiles
Allow the adhesive to dry completely before beginning the grouting process. Use a caulking gun to apply grout along the edges of the tiles. A putty knife can be used to fill the spaces between tiles, ensuring all gaps are sealed. Smooth out the grout to create a clean and polished finish.
Step 6: Final Touches
Clean any excess grout using a detergent and scrubber, then rinse the tiles thoroughly with fresh water. Use a wet vacuum to remove any remaining water from the pool surface. Let the tiles dry completely, and for best results, allow the adhesive and grout to set for at least two days before refilling the pool with water.
By carefully following these steps, you can achieve a durable, professional-quality tile installation that transforms your fiberglass pool into a visually stunning feature.

Conclusion: Pool Tiles on Fiberglass for a Stunning Finish
One effective way to make your pool stand out and elevate its appearance is to install pool tiles over a fiberglass pool. Although some people may initially think this process is complicated due to the unique materials involved, it is important to emphasize that it closely resembles the installation of regular tiles. Moreover, by adopting the right approach and seeking assistance when necessary, you can successfully complete the tiling process. As a result, this will not only enhance the beauty of your pool but also transform it into a stunning feature of your backyard.
Therefore, it is highly recommended that you explore various design options to find the one that aligns best with your personal preferences. In addition, you can stay within a reasonable budget by carefully planning and selecting high-quality materials. Furthermore, this approach ensures both durability and aesthetic appeal. Ultimately, this effort will help you create the pool of your dreams and ensure it becomes a centerpiece that brings joy, functionality, and value to your home.
Ready to transform your pool? Order a sample today to see our premium pool tiles up close and experience the quality for yourself!
Order your samples!